



Blog
How to Mount a Wall-Mounted Network Cabinet Safely in Europe: Brick, Concrete and Plasterboard Fixings

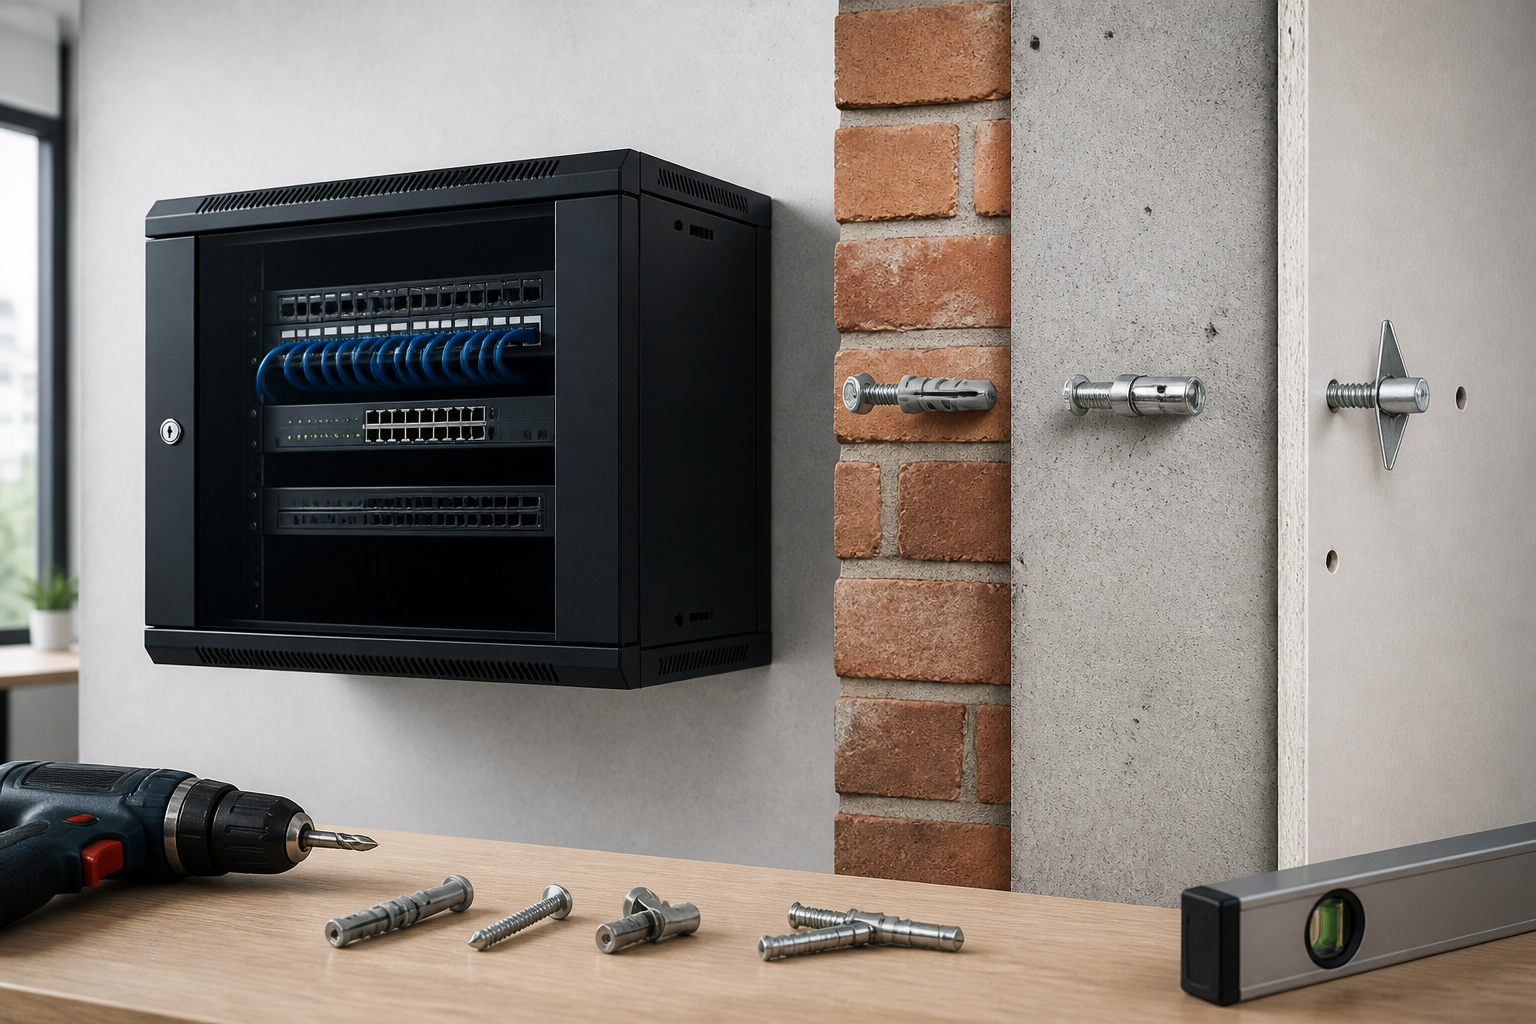
Direct answer: To learn how to mount a wall-mounted network cabinet safely, first confirm the cabinet weight and equipment load, locate solid structural fixing points, choose anchors suitable for brick, concrete or plasterboard, and keep enough clearance for cables, ventilation and maintenance. Mark the holes accurately, secure the cabinet level, then inspect every fixing before installing network equipment.
A wall-mounted cabinet can protect switches, patch panels, routers and small servers while keeping an installation organised. However, a loaded cabinet may be much heavier than its empty shipping weight. Safe installation therefore depends on the wall structure, the fixing system and the way the equipment will be supported over time.
Plan the wall-mounted network cabinet installation
Before drilling, read the cabinet manufacturer’s instructions. Check its maximum safe load, mounting-hole pattern, required screw size and ventilation clearances. Some cabinets are designed for rear mounting only, while others use a removable mounting plate or a two-person lifting system.
Calculate the expected finished weight. Include the cabinet, patch panels, switches, power distribution unit, shelves, cable management accessories and any battery-backed equipment. Add a sensible margin for future expansion. A cabinet that is safe when empty may become unsafe when filled with heavy equipment or when cables exert pulling forces.
Choose the position carefully
- Keep the cabinet close enough to the cable entry point to avoid unnecessary cable strain.
- Leave space above, below and to the sides for ventilation and access.
- Allow the front door to open fully and provide working room for patching.
- Check that the wall can support the combined static load and occasional installation forces.
- Avoid mounting directly over radiators, damp areas or locations exposed to water.
- Keep the cabinet away from strong heat sources and dusty machinery.
- Confirm that the finished installation will not obstruct doors, escape routes or electrical equipment.
In offices, workshops and commercial premises, also consider local building, electrical and fire-safety requirements. If cables pass through fire-rated walls or floors, use an approved fire-stopping method. Do not remove a fire barrier and leave the penetration unsealed.
Tools and materials you may need
- Tape measure, pencil and spirit level
- Stud, pipe and cable detector
- Hammer drill or rotary hammer suitable for the wall material
- Masonry, wood or plasterboard bits as appropriate
- Correct anchors, screws, washers and spacers
- Socket driver or torque-controlled screwdriver
- Step ladder or lifting support
- Vacuum or brush for cleaning drilled holes
- Personal protective equipment, including eye protection and hearing protection
Use fixings from a reputable manufacturer and follow the stated installation method. The screw diameter, embedment depth, hole diameter and edge distance all affect the rated capacity. Never assume that a large screw is automatically safer; an unsuitable anchor can fail even when it looks substantial.
How to mount a wall-mounted network cabinet on brick or concrete
Brick and concrete generally provide a strong base, but their condition and type matter. Hollow brick, lightweight block, old friable mortar and cracked concrete require different anchors from sound solid concrete. Identify the substrate before selecting the fixing.
Brick wall fixing method
- Hold the cabinet or its mounting template against the wall and mark the fixing holes. Use a spirit level to check the horizontal line.
- Position holes in the centre of sound bricks where possible. Avoid weak mortar joints, damaged bricks and areas close to an unsupported edge.
- Scan for hidden pipes and cables before drilling.
- Drill with the correct masonry bit to the anchor manufacturer’s stated diameter and depth. Keep the drill square to the wall.
- Remove dust from each hole. Dust left in the hole can reduce anchor grip.
- Insert suitable masonry plugs, sleeve anchors or other approved fixings. For hollow or lightweight masonry, use anchors specifically rated for that substrate.
- Lift the cabinet into position, fit washers where specified and tighten the screws evenly.
- Recheck the level and confirm that the cabinet does not rock or pull away from the wall.
For a heavy cabinet or a heavily populated rack, obtain the anchor manufacturer’s load data rather than relying on a general rule. If the wall is made from hollow block or thin brick, a specialist may recommend chemical anchors, through-bolts or a load-spreading backboard.
Concrete wall fixing method
Sound reinforced concrete can accept high-capacity fixings, but drilling may encounter steel reinforcement. Do not cut reinforcement without professional advice. If a hole meets steel, stop and reassess the mounting pattern rather than forcing the drill through it.
Use concrete-rated expansion anchors, concrete screws or bonded anchors according to the cabinet load and the manufacturer’s instructions. Expansion anchors need adequate embedment and sufficient distance from edges. Clean the hole thoroughly, especially when using bonded systems, and observe the required curing time before applying the load.
Where the wall is insulated internally or covered by a service void, account for the non-structural layer. The anchor must engage sufficiently with the structural concrete, and stand-off spacers may be needed to prevent crushing the finish.
Mounting a wall-mounted network cabinet on plasterboard
Plasterboard alone is usually not the preferred support for a loaded network cabinet. The safest approach is to fix into structural studs, timber noggins or a suitably reinforced backing board. Standard plasterboard plugs may be acceptable for light accessories, but they should not automatically be used for a cabinet containing switches, power supplies and shelves.
Preferred plasterboard fixing options
- Timber studs: Fix through the plasterboard into the centre of the stud using structural wood screws of suitable length and diameter.
- Metal studs: Verify the stud’s thickness and load rating. A metal-stud wall may need reinforcement or a continuous backing panel.
- Timber noggins: Install horizontal structural timber behind the board at the cabinet’s mounting height, then attach the cabinet directly to it.
- Reinforced plywood backboard: Secure the backboard to multiple studs, then mount the cabinet to the board. This spreads the load and makes future positioning easier.
- Specialist hollow-wall anchors: Use only when the manufacturer confirms their capacity for the complete cabinet load and the dynamic forces of installation.
Use a stud detector, small inspection opening or building drawings to establish the framing layout. Do not rely on a detector alone where pipes or cables may be present. If the cabinet location does not align with studs, fit structural reinforcement before mounting it.
When using a backboard, the board itself must be fixed securely to several structural members. The cabinet screws should not merely grip the board’s surface. Use washers where appropriate, avoid crushing the plasterboard and check that the cabinet remains level while tightening.
Install the cabinet step by step
1. Prepare the cabinet
Remove doors, side panels or internal accessories if the manufacturer permits it. This reduces weight and makes handling easier. Keep all fasteners organised. Some cabinets have a removable rear plate, which can be fixed first before the cabinet body is attached.
2. Mark the mounting holes
Use the supplied template or hold the mounting plate against the wall. Mark every required hole, not just the upper pair. Measure from a known reference point and check the level in both directions. Before drilling, compare the marks with the wall structure and the expected cable route.
3. Drill and install the anchors
Drill at a controlled speed using the correct bit. Avoid enlarging a hole by moving the drill sideways. Clean the hole and install each anchor to the specified depth. If an anchor spins, pulls out or does not seat correctly, remove it and repair the location using an approved method; do not simply tighten harder.
4. Lift and secure the cabinet
Use two people or a temporary support for a large cabinet. Engage the upper fixings first if the design allows, then install the remaining screws. Tighten progressively in a diagonal pattern so the cabinet sits flat against the wall. Do not overtighten, particularly into timber or plasterboard reinforcement.
5. Check the finished mounting
Confirm that all fixing heads are seated, the cabinet is level and there is no visible wall damage. Apply gentle hand pressure at the top and bottom of the cabinet. It should not shift, tilt or separate from the wall. This is only a basic inspection, not a substitute for the anchor manufacturer’s load calculation.
Cabling, earthing and ventilation considerations
Plan cable entry before filling the cabinet. Use suitable glands, brush panels or cable guides to protect cable jackets from sharp metal edges. Maintain bend-radius requirements for copper and fibre cabling, and do not place excessive tension on patch-panel connectors.
Keep power and data cabling organised and follow the applicable separation requirements. Use a rack-mounted power distribution unit where suitable, and avoid overloading a socket or extension lead. Any mains wiring, fixed electrical work or protective bonding should be completed by a competent person in accordance with the applicable national rules.
Metal cabinets may require protective bonding or earthing depending on the installation design and local regulations. Do not assume that mounting screws provide a reliable electrical earth. Ask a qualified electrician to verify the arrangement where the cabinet contains mains equipment or forms part of a structured installation.
Do not block ventilation openings. Leave the manufacturer’s recommended clearance around switches and power supplies, and use blanking panels where appropriate to control airflow. Check the temperature after the equipment has operated under normal load.
Common mistakes to avoid
- Mounting a loaded cabinet into plasterboard without structural reinforcement
- Fixing into mortar or a damaged brick instead of sound masonry
- Using anchors without checking their rating for the actual wall material
- Failing to clean drilled holes before installing anchors
- Ignoring concealed cables, pipes or reinforcement
- Installing the cabinet where the door or rear access cannot open
- Overtightening screws and crushing plasterboard or wall finishes
- Adding equipment without reassessing the cabinet’s load and ventilation
- Leaving fire-rated penetrations unsealed
Final inspection and maintenance checklist
| Check | What to verify |
|---|---|
| Structure | The wall type and condition match the selected fixing system. |
| Fixings | Every required anchor and screw is installed, seated and tightened correctly. |
| Alignment | The cabinet is level, stable and not pulling away from the wall. |
| Load | The populated cabinet remains within its stated weight limit. |
| Access | Doors, panels and cable routes remain accessible. |
| Safety | Cables, electrical connections, bonding and fire stopping meet the relevant requirements. |
| Environment | Ventilation is unobstructed and operating temperatures are acceptable. |
Inspect the installation after initial loading and again during routine maintenance. Look for loosening, cracks, cabinet movement, overloaded shelves or damaged cables. If the wall shows cracking or the cabinet moves, unload it safely and investigate before continuing to use it.
Key takeaways
- Choose the fixing for the wall material, not simply for the cabinet hole size.
- Use studs, noggins or structural backing for plasterboard installations.
- Allow for the fully loaded weight, future equipment and cable forces.
- Keep ventilation, access, cable bend radius and electrical safety in the design.
- When the substrate or load is uncertain, consult the anchor manufacturer or a qualified installer.
Frequently asked questions
Can I mount a network cabinet directly to plasterboard?
Only if the selected hollow-wall fixing system is specifically rated for the complete load and installation conditions. For most loaded cabinets, fixing into studs, noggins or a structural backboard is safer and more reliable than relying on plasterboard alone.
What is the best fixing for a concrete wall?
The best fixing depends on the cabinet’s loaded weight, concrete condition, edge distances and the manufacturer’s load data. Concrete screws, expansion anchors and bonded anchors can all be suitable when correctly specified and installed.
Should a wall-mounted network cabinet be earthed?
A metal cabinet may need protective bonding or earthing depending on the equipment and the electrical installation. A qualified electrician should verify the arrangement; mounting screws should not be assumed to provide a dependable earth connection.
How much clearance does a network cabinet need?
Use the cabinet and equipment manufacturers’ clearance instructions. Provide enough space for the door, patching, cable bend radius, ventilation and maintenance, and do not obstruct air inlets or outlets.
When should a professional install the cabinet?
Use a professional when the wall is damaged or uncertain, the cabinet is heavily loaded, reinforcement or fire-rated construction is involved, or mains wiring and protective bonding are required. Professional advice is also appropriate when anchor capacity cannot be verified.
{“@context”:”https://schema.org”,”@type”:”FAQPage”,”mainEntity”:[{“@type”:”Question”,”name”:”Can I mount a network cabinet directly to plasterboard?”,”acceptedAnswer”:{“@type”:”Answer”,”text”:”Only if the selected hollow-wall fixing system is specifically rated for the complete load and installation conditions. For most loaded cabinets, fixing into studs, noggins or a structural backboard is safer and more reliable than relying on plasterboard alone.”}},{“@type”:”Question”,”name”:”What is the best fixing for a concrete wall?”,”acceptedAnswer”:{“@type”:”Answer”,”text”:”The best fixing depends on the cabinet’s loaded weight, concrete condition, edge distances and the manufacturer’s load data. Concrete screws, expansion anchors and bonded anchors can all be suitable when correctly specified and installed.”}},{“@type”:”Question”,”name”:”Should a wall-mounted network cabinet be earthed?”,”acceptedAnswer”:{“@type”:”Answer”,”text”:”A metal cabinet may need protective bonding or earthing depending on the equipment and the electrical installation. A qualified electrician should verify the arrangement; mounting screws should not be assumed to provide a dependable earth connection.”}},{“@type”:”Question”,”name”:”How much clearance does a network cabinet need?”,”acceptedAnswer”:{“@type”:”Answer”,”text”:”Use the cabinet and equipment manufacturers’ clearance instructions. Provide enough space for the door, patching, cable bend radius, ventilation and maintenance, and do not obstruct air inlets or outlets.”}},{“@type”:”Question”,”name”:”When should a professional install the cabinet?”,”acceptedAnswer”:{“@type”:”Answer”,”text”:”Use a professional when the wall is damaged or uncertain, the cabinet is heavily loaded, reinforcement or fire-rated construction is involved, or mains wiring and protective bonding are required. Professional advice is also appropriate when anchor capacity cannot be verified.”}}]}